


How To Install Chain Link Fence?
Installing a chain link fence is a practical and cost-effective way to protect your property, define boundaries, or keep pets and children safe. While it may seem like a daunting task, reading this article will fully assist you in the correct installation.
Required Tools and Materials
Tools
– Digger or drill
– Shovel
– Level
– Tape measure
– Rope
– Wire cutters
– Wrench
– Screwdriver
– Hammer
– Hacksaw or reciprocating saw
– Concrete mixer (optional)
Accessories List
Materials
– Chain link mesh
– Terminal posts (corner posts and end posts)
– Wire posts
– Top rails
– Tie rods
– Railing ends
– Tension straps
– Fence ties
– Concrete mix
– Gates (if required)
– Fasteners (bolts, nuts, screws)

how-to-install-chain-link-fence-on-a-slope
Step-by-step installation
1. Planning and measuring
Mark the Boundary: Use stakes and string to mark the fence line. Make sure the corners are square.
Measure the Perimeter: Measure the total length of the fence to determine the amount of material needed.
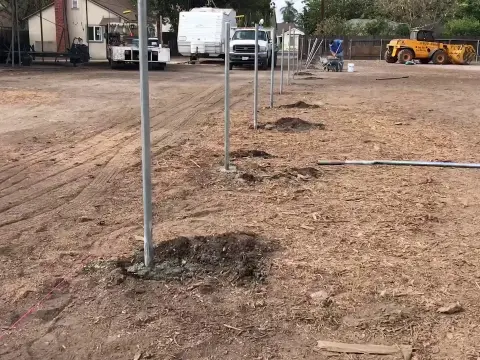
2. Set the terminal post
Digging post holes
Hole Depth: Dig holes for terminal posts
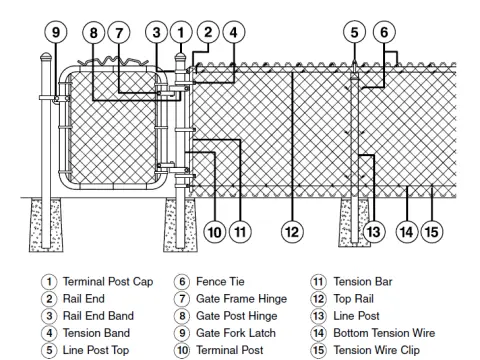
Fence post installation diagram
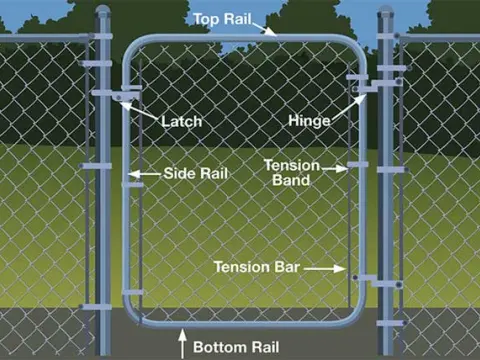
Chain link gate structure
(corner posts and end posts) approximately 24-30 inches deep, depending on fence height and soil conditions.
Hole Diameter: The diameter should be approximately three times the width of the post.
Setting up the columns
Place the post: Insert the terminal post into the hole. Use a level to make sure the post is plumb.
Temporary support: Use brackets to hold the post in place while the concrete sets.
Pouring concrete
Mix Concrete: Prepare the concrete mix according to the proportion instructions.
Fill Holes: Pour the concrete into the holes around the posts.
Level Posts: Recheck the verticality of the posts and adjust if necessary.
Cure Concrete: Allow the concrete to cure for at least 24-48 hours.
3. Install the wire posts
Measure and mark spacing: Line posts should be spaced 8-10 feet apart. Mark locations on the fence line.
Dig holes and set posts: At the same depth as terminal posts, insert line posts, check for verticality, and temporarily support.
Pour concrete to fill holes: Pour concrete around line posts and allow to cure.
Dig a hole
The edge is nested
4. Install the top railing
Attach rail ends: Attach rail ends to terminal posts using tension straps and bolts.
Attach top rail: Measure and cut top rail to fit terminal posts.
Insert rail: Slide top rail into rail ends.
Secure: Secure top rail to wire posts using fence ties.
5. Unfold and connect the chain link net
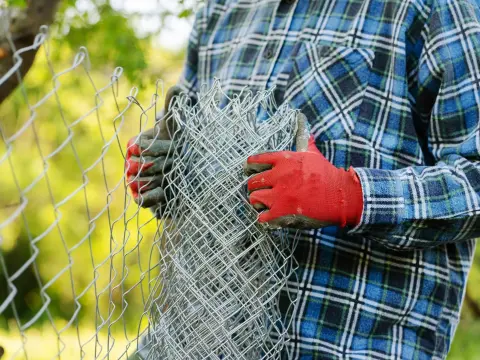
Unfold the net

Grid laying
Positioning: Starting at one end post, unroll the chain link fabric along the fence line.
Attach the fabric to the end post
Tension rod: Insert the tension rod into the end of the chain link fabric.
Tension strap: Attach the tension strap to the end post and slide the tension rod into the tension strap.
Secure: Tighten the bolts to secure the tension
rod and tension strap.
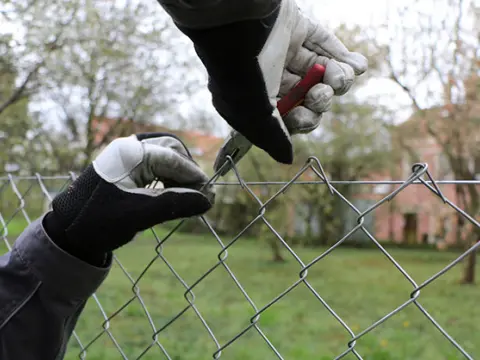
Stretch the chain link netting: Use the telescoping tool to stretch the chain link fabric tightly along the fence line.
Securing the wire post: Use the fence tie to secure the fabric to the wire post.
Securing to the next end post
Tension rod and tension strap: Repeat the process of inserting the tension rod and attaching the tension strap at the next end post.
Secure: Tighten the bolts to secure the netting.
6. Install gate (if applicable)

Bottom tension wire

Fastened to the tension wire
Set gate posts
- Dig holes: Dig holes for gate posts, making sure they are plumb and properly spaced from the gate.
- Set posts: Insert gate posts, check plumbness, and temporarily brace.
- Pour concrete: Fill holes with concrete and allow to cure.
Install gate
Hinges: Install hinges to gate and gate posts.
Latch: Install latch on the opposite side to secure gate.
7. Final adjustments and cleanup
- Check tightness: Make sure the chain link fabric is tight and secure.
- Posts: Verify that all posts are plumb and the top rail is level.
- Trim excess mesh: Use wire cutters to trim excess chain link fabric.
- Clean up tools: Gather and clean all tools.
- Debris: Clear all debris from the installation site.
Conclusion
Installing a chain link fence is a manageable DIY project that can enhance the security and functionality of your property. By following the steps above and using the right tools and materials, you can create a fence that looks professional and lasts a long time. Whether you are protecting your backyard, enclosing a garden, or defining a property boundary, a chain link fence is a durable and cost-effective solution.

Fix to the column

Fix with binding wire
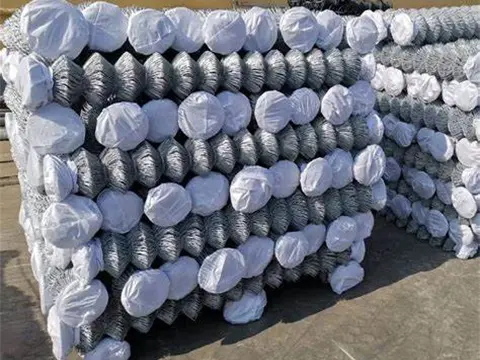
Wanzhi Steel Powder Coated Chain Link Net Package
We have chain link mesh rolls and galvanized chain link gates for sale.
Aluminum Chain Link Mesh
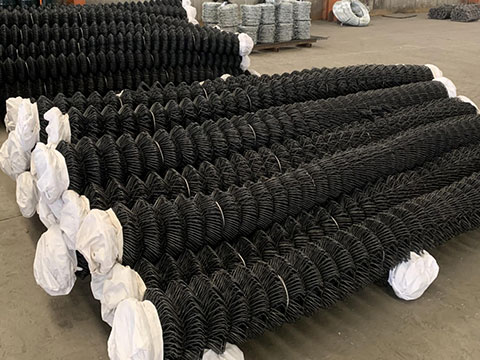
black chain link fence for sale
About Wanzhi Steel
Wanzhi Steel is a 14-year-old chain link fence manufacturer located in China, Hebei province.
We specialize in galvanized and PVC coated, vinyl chain link fence and fencing systems, with a wire diameter range of 2.0 mm-4.0 mm.
Customized height, color, and mesh hole size are available.

temporary chain link fence panels for sale
Our best-selling colors are Green and Black chain link net fence. We also provide Vertical posts and Horizontal posts in 48-75mm diameter.
If you are interested, please contact us for more. Inquire Online or send an email to [email protected].
Leave Us A Message


